> For the complete documentation index, see [llms.txt](https://help.leadboxer.com/leadboxer/llms.txt). Markdown versions of documentation pages are available by appending `.md` to page URLs; this page is available as [Markdown](https://help.leadboxer.com/leadboxer/integrations/email/marketing-emails/autopilot.md).
# Autopilot
### Step 1: Track email opens
To track mail open/reads from your Autopilot audience in LeadBoxer, you need to add a LeadBoxer tracking pixel to your campaigns or templates.
Here are the steps needed for adding the tracking pixel:
1. Go to your campaign or template
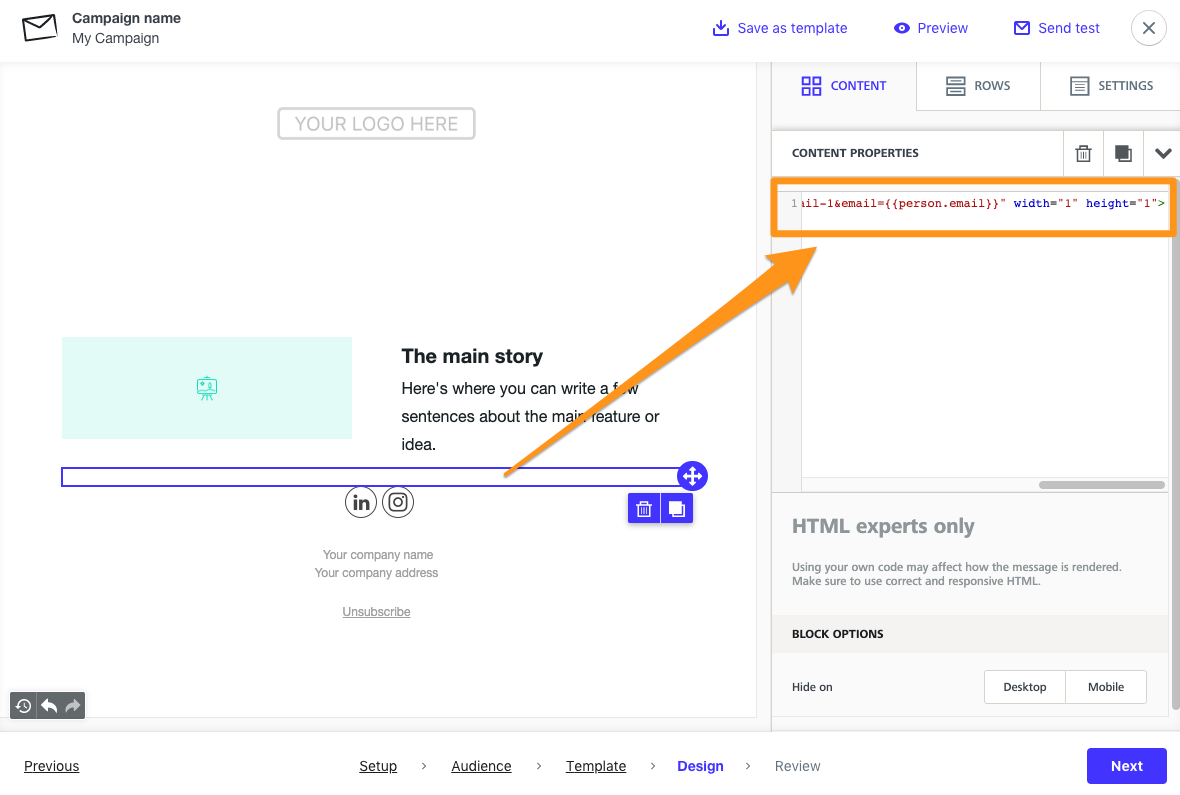
2. Add or edit an HTML element in where we can add our tracking pixel
3. Add in your email tracking pixel at the bottom of the HTML:
{% code overflow="wrap" %}
```html
```
{% endcode %}
Close and Save
**Notes:**
* Don't forget to change the **DATASET ID** in the pixel to your own
* Change the campaign value to reflect the email title or campaign name
* you can add other template variables as parameters if you have them, eg
* *\&companyName={{person.organization}}*
* *firstName=*{{person.firstname}}
* etc
***
### Step 2: Track email clicks and identify prospects on your site
To track email clicks, you need to modify the links inside your email campaigns and add this parameter to the URL of the link:
**\&email={{person.email}}**
This will allow us to identify the individual visitors when they land on your site.
**UTM tags**\
In order for us to classify this visit coming an email, you need to add the UTM tag **\&utm\_medium=email**\
So either enable the automatic UTM tag settings in Autopilot or manually add these to your links
Optionally but recommended, you should add additional parameters to update the visitor with other information from your database:
**Full example URL**
{% code overflow="wrap" %}
```
https://www.YOURDOMAINNAME.com/my-landing-page/?firstName={{person.firstname}}&lastName={{person.lastname}}&email={{person.email}}&companyName={{person.organization}}&utm_medium=email
```
{% endcode %}
Tip: Best practice is to test before sending out a mass email
---
# Agent Instructions
This documentation is published with GitBook. GitBook is the documentation platform designed so that both humans and AI agents can read, navigate, and reason over technical content effectively. Learn more at gitbook.com.
## Querying This Documentation
If you need additional information that is not directly available in this page, you can query the documentation dynamically by asking a question.
Perform an HTTP GET request on the current page URL with the `ask` query parameter, and the optional `goal` query parameter:
```
GET https://help.leadboxer.com/leadboxer/integrations/email/marketing-emails/autopilot.md?ask=&goal=
```
`ask` is the immediate question: it should be specific, self-contained, and written in natural language.
`goal` is optional and describes the broader end goal you are ultimately trying to accomplish on behalf of the user. GitBook uses it to tailor the answer towards what is most useful for that goal.
The response will contain a direct answer to the question and relevant excerpts and sources from the documentation.
Use this mechanism when the answer is not explicitly present in the current page, you need clarification or additional context, or you want to retrieve related documentation sections.
