LogoLogo
  • LeadBoxer — Lead Data Platform —Documentation
  • 🛠️Getting Started
  • Lead Management Workflow
    • Cold outbound email campaigns
  • How does it all work?
  • 🏗️Fundamentals
    • Leads & Accounts
      • Lead card: Complete lead details in one page
      • Batch operations
    • LeadBoard
    • Reports
    • Definitions & Glossary
    • Elements
      • Filters
      • Segments
      • Workflow Automation
      • Notifications
      • Users
      • Datasets
      • Clients (agents)
      • Lists
      • Enrichment
      • Leadscore
      • Lead & Account Tags
      • Import & Export
        • Upload Leads
        • download data
        • LinkedIn Matched Audiences export
        • Custom Properties
        • LeadBoxer User Interface Placeholder Names
      • Roles & Permissions
  • 🧩Integrations
    • 🌐Website
      • Lead Tracking Pixel
      • WordPress plug-in
        • track my WordPress user logins?
      • Google Tag Manager (GTM)
      • Drupal module
      • Gravity Form Tracking
      • Change website content based on behaviour
      • Track meta data using JSON-LD
      • Cross device tracking
      • Tracking marketing campaign data (UTM tags)
      • UTM tags for Google Adwords
      • How to track user logins
      • Automatic form tracking
      • Manual form tracking
      • How to get (raw) lead data
      • Magento
      • Adobe Tag Manager
      • Unbounce landing pages
      • Tracking pixel into Wix
    • ✉️Email
      • Individual emails
        • Gmail Email tracking
        • G Suite email tracking
        • Official Outlook Add-in
        • Advanced Outlook Add-in
        • Manually Identify leads using email
        • Legacy Outlook plugin
        • Linkedin InMail or Invite Link Tracking
      • marketing emails
        • 1. Setup Tracking Pixel
        • 2. Track Email Opens
        • 3. Track Email Clicks
        • Mailchimp
        • HubSpot
        • Sharpspring
        • ActiveCampaign
        • Pipedrive Campaigns
        • Eloqua
        • Copernica
        • Intercom
        • Mailup
        • Brevo
        • Poppulo
        • Reply.io
        • Spotler mail+
        • Prospect.io
        • Woodpecker
        • Instantly
        • Mailerlite
        • Lemlist
        • Autopilot
        • Constant Contact
        • dotdigital
        • Apollo.io
        • LaPosta
        • Customer.io
        • Campaign Monitor
        • QuickMail
        • Outreach
        • Mail Merge (MS Word)
    • Other
      • Active Campaign
      • HubSpot
      • Marketo
      • LinkedIn
        • LinkedIn job titles search
      • Google Places
      • Calendly
      • How to get LeadBoxer data into Intercom
      • Zapier
        • Advanced Zapier usage
        • Zapier webhook
        • Connect Leadboxer to Pipedrive with Zapier
        • Connect Leadboxer to Slack with Zapier
        • Connect Leadboxer to Salesforce with Zapier
      • Pipedrive
        • Pipedrive Workflow Automation with LeadBoxer
      • Whatagraph
      • Google BigQuery
      • Single Sign On (SSO)
  • 🦮Guides
    • Creating your first Segment
    • Creating your first LeadBoard
    • How to add a user
    • How to upload a List (ABM)
    • How to add a datasets
    • How to create a notification
    • How to set your Leadscore
    • How to hide & unhide Leads
    • Filter Leads from ad campaigns
    • How to create a Workflow Automation
    • How to mask IP addresses
  • 🏆Solutions
    • Lead Identification
    • Lead Qualification
    • Lead Managment
  • Extras
    • Changelog
    • Email tracking info
    • linkedIn industries
    • LeadBoxer reseller getting started
    • How to contact leads
    • LeadBoxer cookies
  • Terms of Service
  • Privacy Policy
Powered by GitBook
On this page
  • Step 1: Start your (trial) license
  • Step 2: Configure your license
  • Step 3: Install the add-in
  • Step 6: tracking details

Was this helpful?

  1. Integrations
  2. Email
  3. Individual emails

Official Outlook Add-in

PreviousG Suite email trackingNextAdvanced Outlook Add-in

Last updated 8 months ago

Was this helpful?

LeadBoxer has 3 different Outlook plugins:

  1. The Official add-in

  2. The Legacy plug-in

This page is about the Official Outlook Add-in

NOTE: Do not Install if you are using the 'New UI' version on Mac. It is not compatible.

This Add-in delivers the option to track personalised emails sent to individuals through Outlook, and connect this behavior to your LeadBoxer account. This technology can also track links clicked to your site (website activity) and identify the individuals who click on the links to your site.

Step 1: Start your (trial) license

  1. Login with your Work or School account* * This is only needed to setup billing, once the license is activated you can add any MS email address.
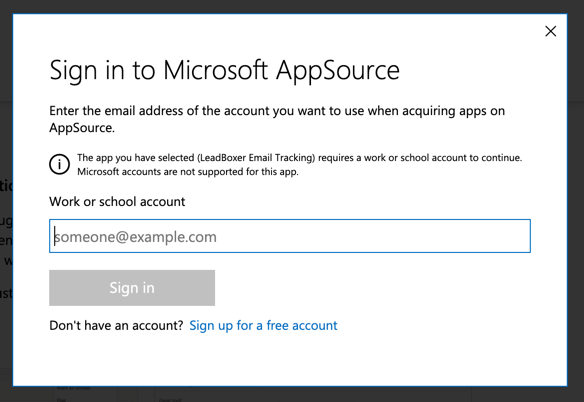
  2. Once logged in, select your Plan & Term. You can choose monthly or yearly billing. The first month is free and you can cancel at any time.
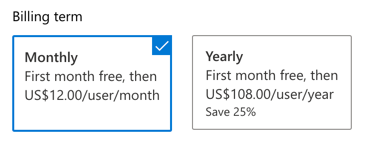
  3. Select the number of seats you want to start with.

  4. Add Payment method to be used for after the free trial

  5. Place your order and wait for Microsoft to process it


Step 2: Configure your license

Once your order has been processed, you need to configure your license

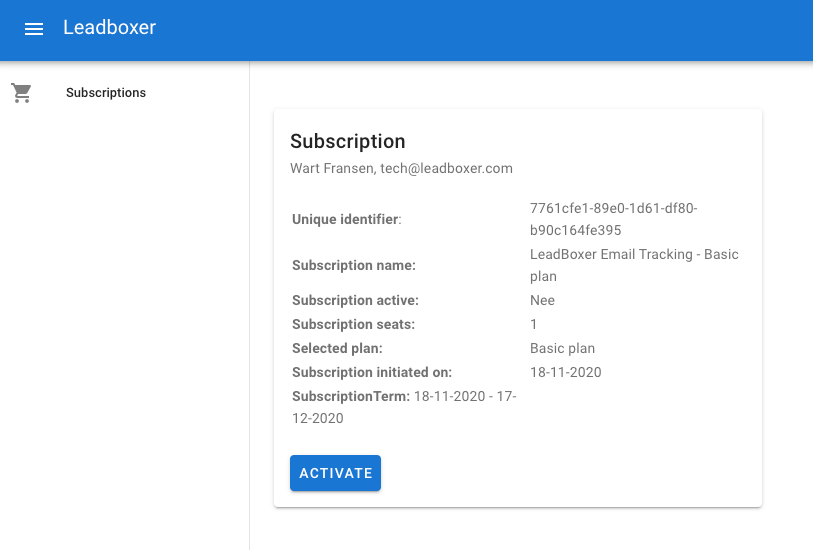
  1. If you are still on the Appsource page, click the configure button

  2. Once logged in, activate your license

  3. Once activated, you can start assigning users to seats

  4. Each email address (user) added to the licensed users list will receive an email with instructions to install individually.


Step 3: Install the add-in

There are multiple options to install the actual add-in, depending on the account and permission structure of your company.

You can install the add-in individually, or if you are an MS Office Admin you can add/ deploy globally.

To install as Individual:

  1. In your Outlook application, click on the Get Add-ins button, located in the top of your application
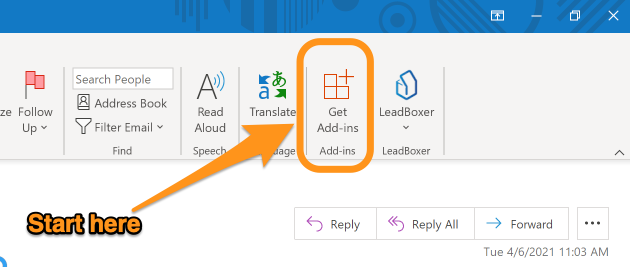
  2. Click on the My add-ins tab and search for LeadBoxer, select and click Add

  3. That's it. You add-in should appear in your Outlook environment and you can start tracking emails.

To install as Group Admin

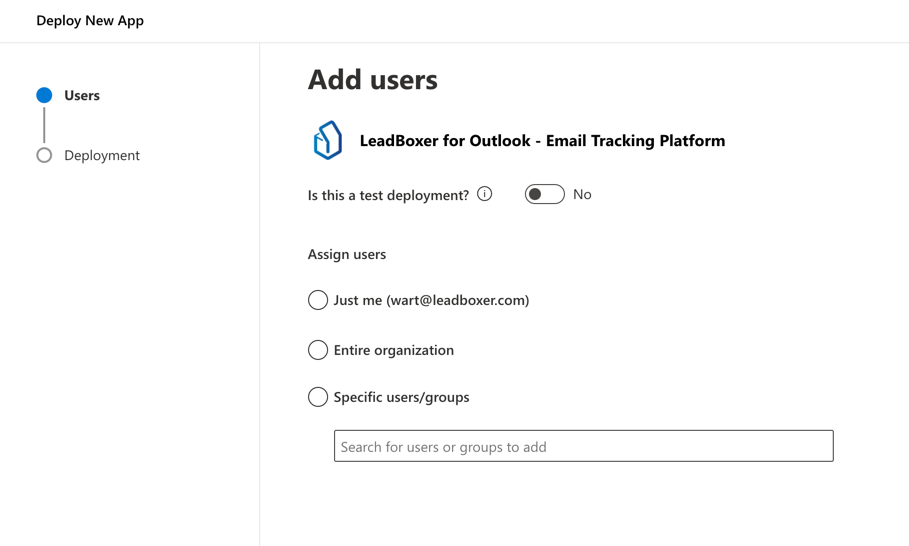
  1. Go to Settings > integrated Apps and click Get apps
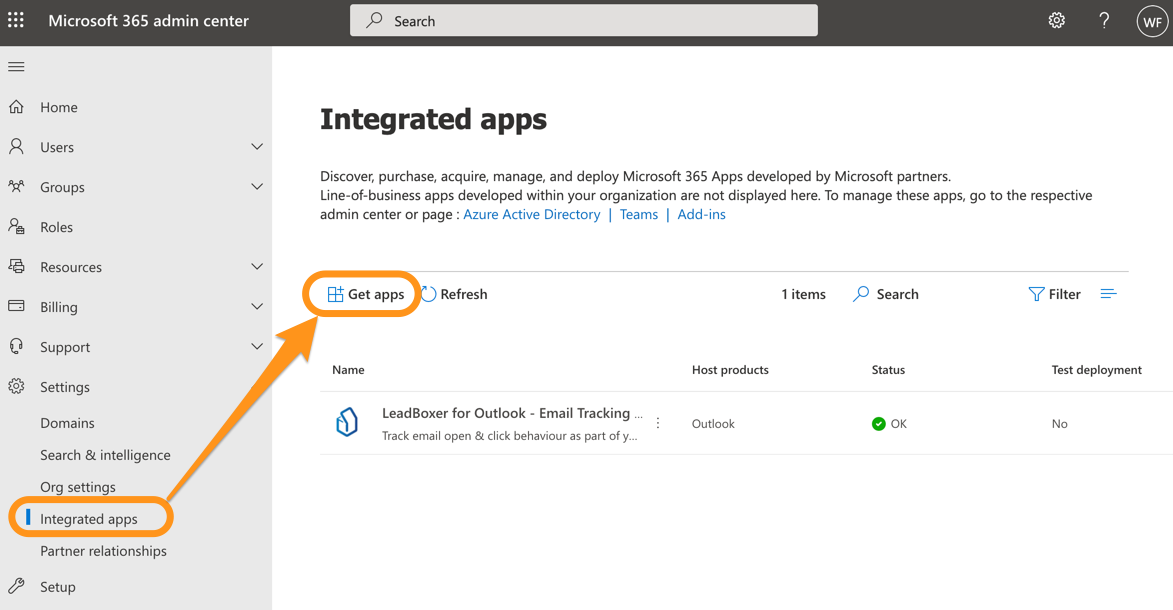
  2. Search for LeadBoxer and select the LeadBoxer for Outlook - Email Tracking Platform and click the Get it now button

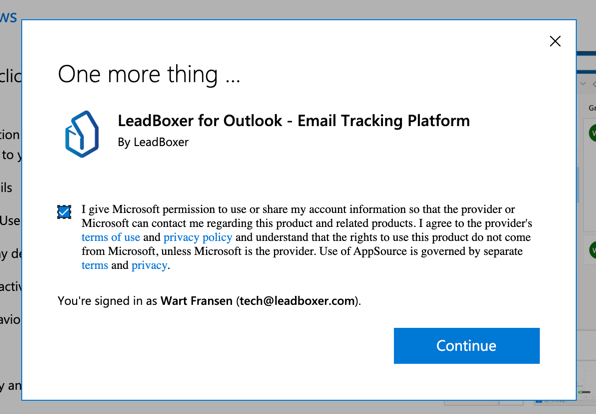
  3. Accept the generic permissions and agree with our terms:
  4. Configure the add-in

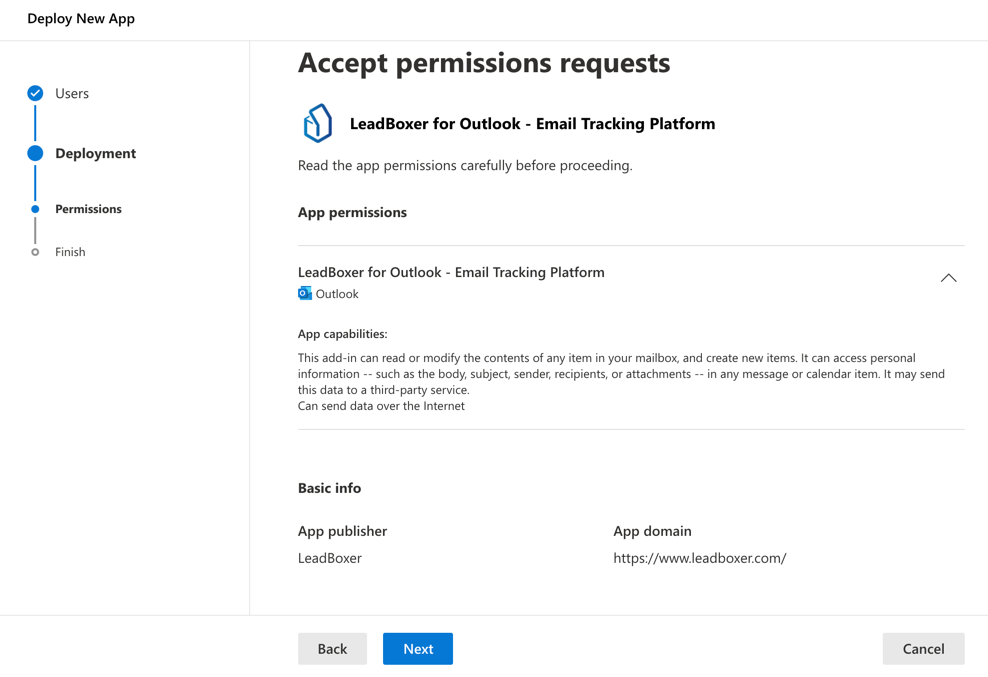
  5. Accept permissions

  6. Once finished, and depending on your configuration your users can now install the plugin. Make sure that each user is registered in the LB portal. There should be no need to configure the add-in on the client side.


Step 4: Configure add-in

Once installed, make sure the add-in is setup correctly by going to the LeadBoxer Settings pane.

In the Settings pane you should see a field for your dataset ID and the option to configure your link tracking.

The dataset ID field should automatically be populated with your dataset ID if you have setup a subscription in step 1 and 2.

Configure Link tracking

Note: Outlook for Mac email client not supported at the moment

In order for us to start tracking the links in your emails, you need to enable this feature and specify the domains you want us to track:
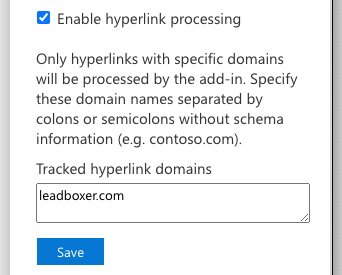

Step 5: Tracking your emails

Compose an email as you would normally, and make sure you add a recipient and the email title (subject). Now, before you send the email, you need to activate the LeadBoxer tracking for each individual email by clicking the three dots icon and selecting the Track this e-mail option from the LeadBoxer menu item.
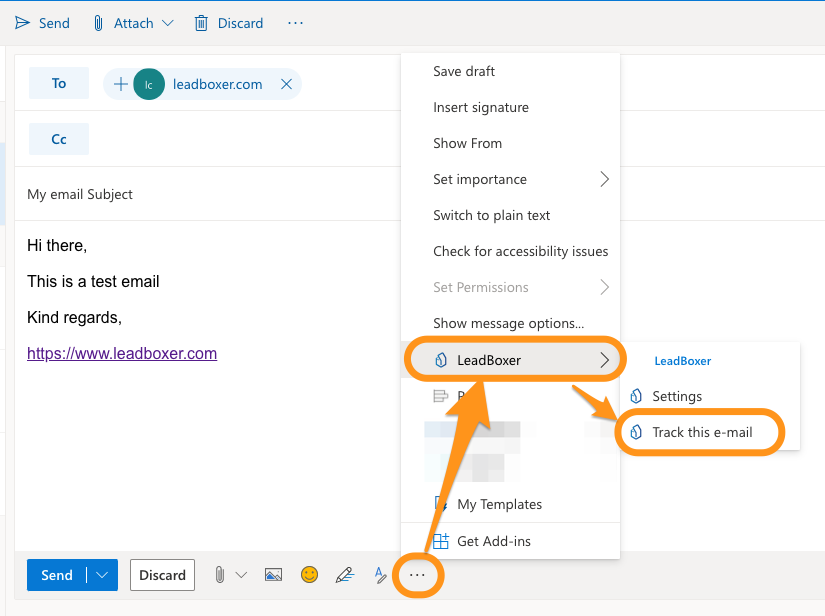
This will add the tracking pixel and append the links inside your emails with tracking parameters.


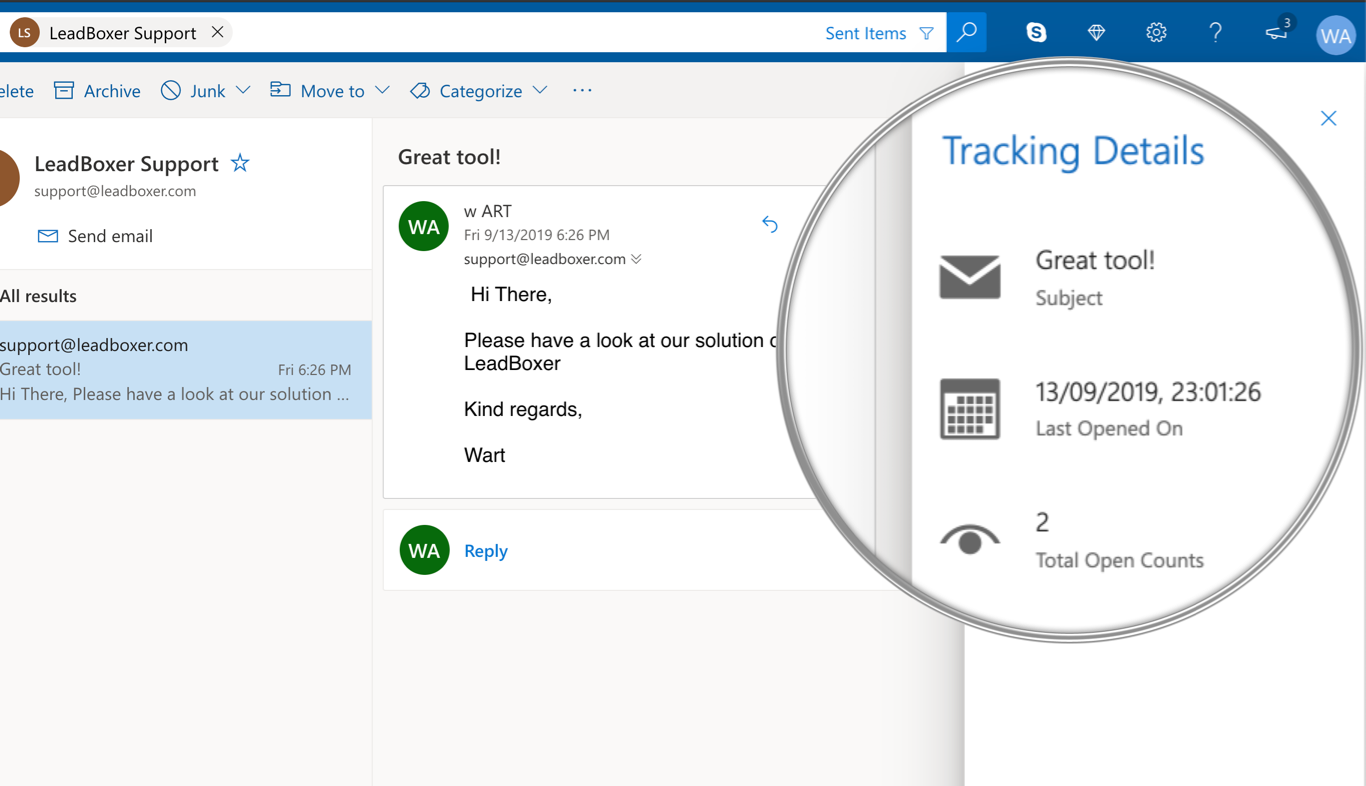
Step 6: tracking details

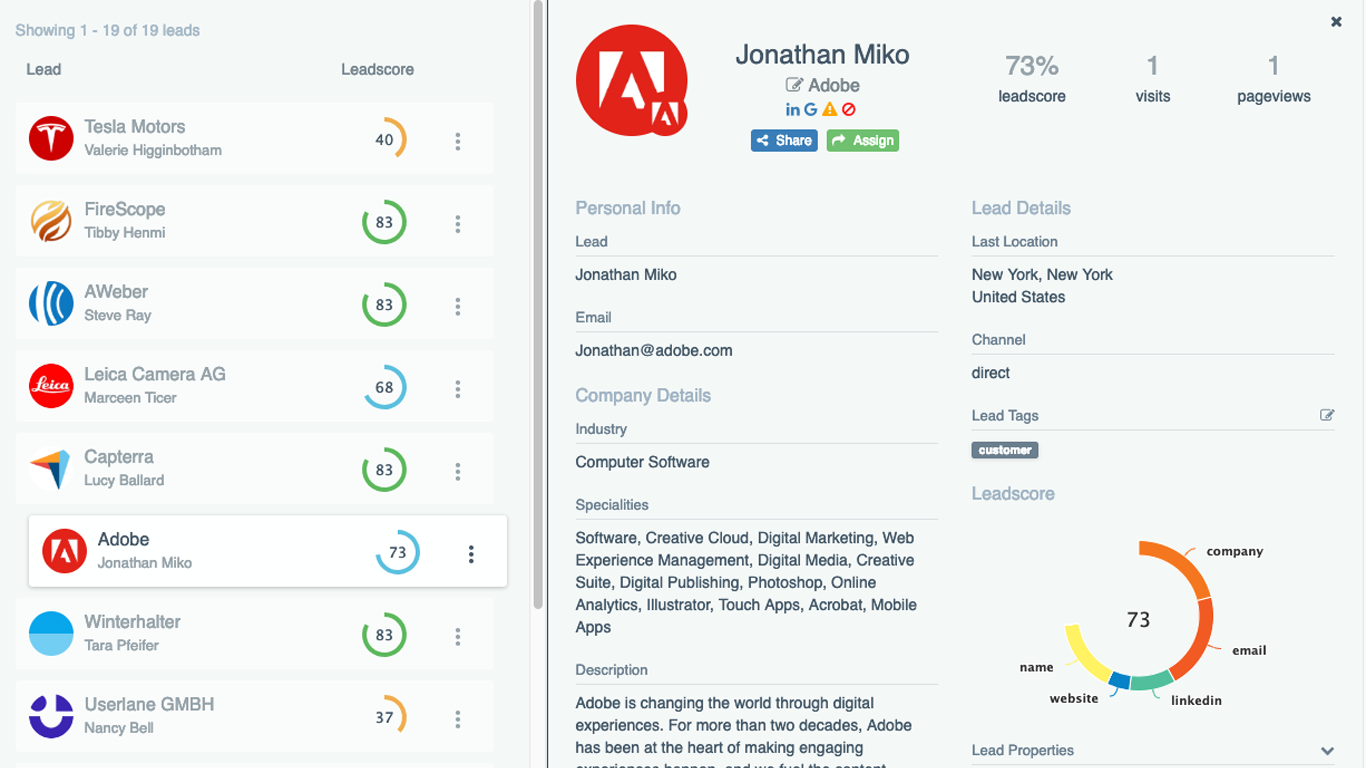
Once the email is sent, you can see tracking details either from within Outlook, or log in to the LeadBoxer app and see all activity.
You will be redirected to the where you will need to authenticate / login again with your Microsoft credentials

Login to your

🧩
✉️
Outlook subscription portal
Microsoft Office Portal
Note: The advanced Add-in version has the option to auto-enable tracking for each email. See details here.
The Advanced add-in