LogoLogo
  • LeadBoxer — Lead Data Platform —Documentation
  • 🛠️Getting Started
  • Lead Management Workflow
    • Cold outbound email campaigns
  • How does it all work?
  • 🏗️Fundamentals
    • Leads & Accounts
      • Lead card: Complete lead details in one page
      • Batch operations
    • LeadBoard
    • Reports
    • Definitions & Glossary
    • Elements
      • Filters
      • Segments
      • Workflow Automation
      • Notifications
      • Users
      • Datasets
      • Clients (agents)
      • Lists
      • Enrichment
      • Leadscore
      • Lead & Account Tags
      • Import & Export
        • Upload Leads
        • download data
        • LinkedIn Matched Audiences export
        • Custom Properties
        • LeadBoxer User Interface Placeholder Names
      • Roles & Permissions
  • 🧩Integrations
    • 🌐Website
      • Lead Tracking Pixel
      • WordPress plug-in
        • track my WordPress user logins?
      • Google Tag Manager (GTM)
      • Drupal module
      • Gravity Form Tracking
      • Change website content based on behaviour
      • Track meta data using JSON-LD
      • Cross device tracking
      • Tracking marketing campaign data (UTM tags)
      • UTM tags for Google Adwords
      • How to track user logins
      • Automatic form tracking
      • Manual form tracking
      • How to get (raw) lead data
      • Magento
      • Adobe Tag Manager
      • Unbounce landing pages
      • Tracking pixel into Wix
    • ✉️Email
      • Individual emails
        • Gmail Email tracking
        • G Suite email tracking
        • Official Outlook Add-in
        • Advanced Outlook Add-in
        • Manually Identify leads using email
        • Legacy Outlook plugin
        • Linkedin InMail or Invite Link Tracking
      • marketing emails
        • 1. Setup Tracking Pixel
        • 2. Track Email Opens
        • 3. Track Email Clicks
        • Mailchimp
        • HubSpot
        • Sharpspring
        • ActiveCampaign
        • Pipedrive Campaigns
        • Eloqua
        • Copernica
        • Intercom
        • Mailup
        • Brevo
        • Poppulo
        • Reply.io
        • Spotler mail+
        • Prospect.io
        • Woodpecker
        • Instantly
        • Mailerlite
        • Lemlist
        • Autopilot
        • Constant Contact
        • dotdigital
        • Apollo.io
        • LaPosta
        • Customer.io
        • Campaign Monitor
        • QuickMail
        • Outreach
        • Mail Merge (MS Word)
    • Other
      • Active Campaign
      • HubSpot
      • Marketo
      • LinkedIn
        • LinkedIn job titles search
      • Google Places
      • Calendly
      • How to get LeadBoxer data into Intercom
      • Zapier
        • Advanced Zapier usage
        • Zapier webhook
        • Connect Leadboxer to Pipedrive with Zapier
        • Connect Leadboxer to Slack with Zapier
        • Connect Leadboxer to Salesforce with Zapier
      • Pipedrive
        • Pipedrive Workflow Automation with LeadBoxer
      • Whatagraph
      • Google BigQuery
      • Single Sign On (SSO)
  • 🦮Guides
    • Creating your first Segment
    • Creating your first LeadBoard
    • How to add a user
    • How to upload a List (ABM)
    • How to add a datasets
    • How to create a notification
    • How to set your Leadscore
    • How to hide & unhide Leads
    • Filter Leads from ad campaigns
    • How to create a Workflow Automation
    • How to mask IP addresses
  • 🏆Solutions
    • Lead Identification
    • Lead Qualification
    • Lead Managment
  • Extras
    • Changelog
    • Email tracking info
    • linkedIn industries
    • LeadBoxer reseller getting started
    • How to contact leads
    • LeadBoxer cookies
  • Terms of Service
  • Privacy Policy
Powered by GitBook
On this page
  • How to place the Lead Tracking Pixel in your website using Google Tag Manager (GTM)
  • Step by step guide
  • Events
  • Simple events
  • Advanced event tracking
  • Complete Example: how to track a button click
  • Google Tag Manager Data Layer Integration

Was this helpful?

  1. Integrations
  2. Website

Google Tag Manager (GTM)

Previoustrack my WordPress user logins?NextDrupal module

Last updated 8 months ago

Was this helpful?

How to place the Lead Tracking Pixel in your website using Google Tag Manager (GTM)

Step by step guide

Here are the basic steps needed to publish the Lead Pixel in your website and start converting anonymous traffic into leads.

Steps:

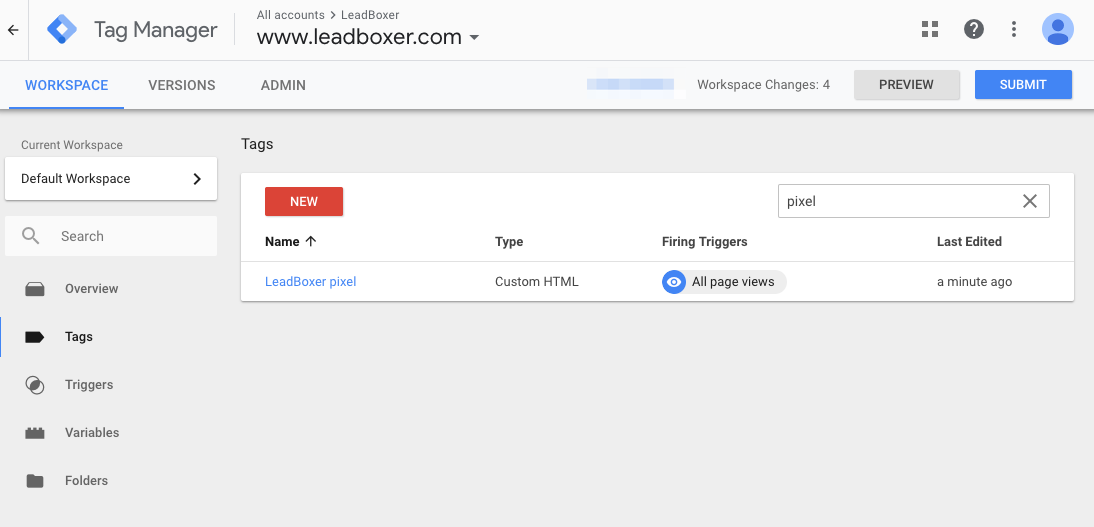
  1. Login to your Google Tag Manager and access your container

  2. To add the Lead Pixel, click on ‘add new tag’

  3. For Tag type, choose: Discover more tag types

  4. Search for LeadBoxer

  5. Add the LeadBoxer pixel tag to your workspace

  6. Next you need to select or create your Trigger. We recommend to set it on all pageviews.
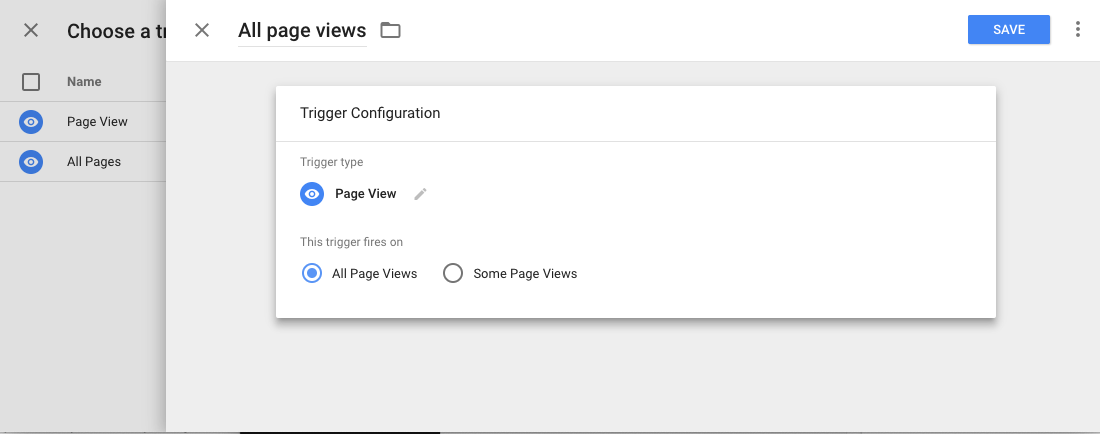
  7. Save the trigger and the tag

  8. Don't forget to Submit (publish) your changes - you’re done, you now have the basic Lead Pixel (javascript) working.

Events

If you want to track on-page events using the Google Tag manager, you can follow these instructions.

Simple events

If you would like to send a simple signal for any on-page event. for example when a lead expands a section on your site, you can use the sendEvent function that is build into the LeadBoxer tag.

Simply add a new Tag like this

<script type="text/javascript"> 
   OTLogService.sendEvent("My simple event name"); 
</script>

And connect this to any trigger

Advanced event tracking

  1. Make sure the LeadBoxer pixel (script tag) is loaded on the initial pageview.

  2. First you need to define a new variable to grab the page title (for some reason GTM does not provide this variable by default so we need to define it ourselves) In your Google Tag Manager container, go to Variables > Javascript Variable and enter
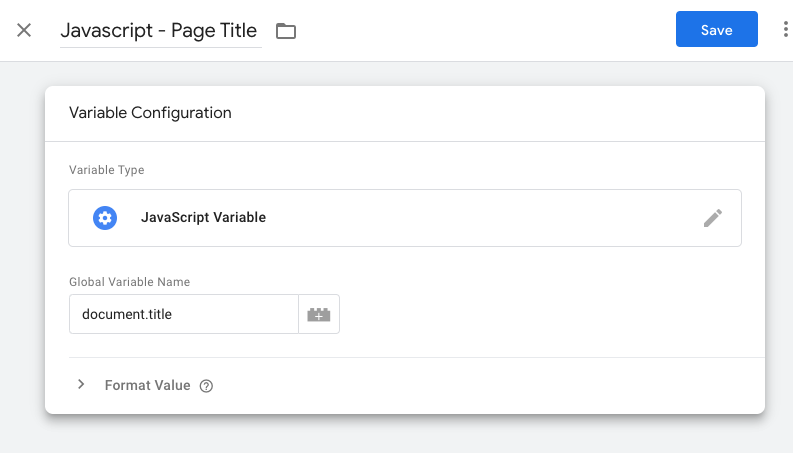
    document.title
  3. Create and send a new event that triggers on every Custom Event.
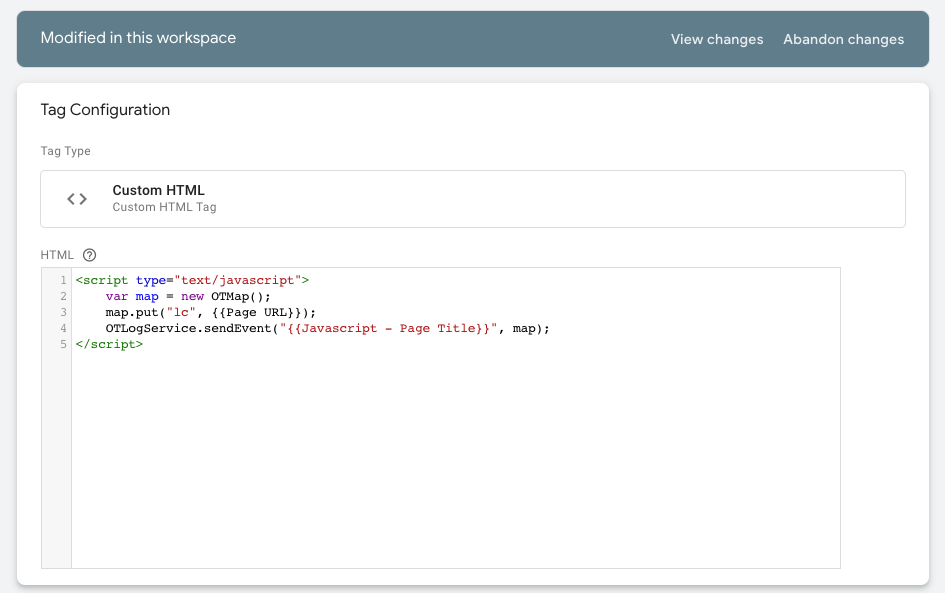
    <script type="text/javascript">    
    	var map = new OTMap();    
    	map.put("lc", {{Page URL}});    
    	OTLogService.sendEvent("{{Javascript - Page Title}}", map); 
    </script>
  4. Now connect this tag to any trigger you want: events, clicks, buttons, downloads, etc.

  5. Don't forget to publish and you should be set.

Complete Example: how to track a button click

  1. In GTM, enable built-in Click Variables To be a able to trigger based on a click you need to enable these specific click variables. Variables are little pieces of information that can be used both in Tags and Triggers. For example, Click ID. You can use it as a trigger condition (e.g. fire the LeadBoxer Event code when the ID of the clicked link equals to “main-cta-link”).

  2. In GTM tag assistant, Find the variable values to trigger on Go to preview mode and on your site, click on the button you want to track. Switch to the assistant mode and you should see the button click listed in your behaviour. Select this click and find the right variable. (in our case the button text works, but you might want to use ID, class, URL or any of the above variables.) Copy the variable value.

  3. in GTM, enable a link click trigger In order to enable link click tracking, we need to enable a thing called link click listener (a.k.a. link click auto-event listener). It’s a feature in GTM that listens to link clicks on a page. If it spots one, it will display that event in the GTM Preview and Debug (P&D) mode, and we’ll be able to use it as a condition to fire tags. In Google Tag Manager, go to Triggers > Trigger Configuration > New > Click - All elements. Set the trigger to only to fire on some Clicks and choose your variable from step 2.

  4. Create a LeadBoxer Event tag to fire on this trigger Create a new tag, and add this javascript to send the custom event to LeadBoxer

    <script type="text/javascript">    
    	var map = new OTMap();    
    	map.put("lc", {{Page URL}});    
    	OTLogService.sendEvent("Case study submit click", map); 
    </script>
  5. Don't forget to connect the tag from step 4 to the trigger from step 3 and also to publish the changes.

Google Tag Manager Data Layer Integration

If you would like to use data from your Data Layer and push it to LeadBoxer, you can do so by implementing the LeadBoxer onload function.

Here is an example snippet of javascript:

// setup the onload function
function ot_onload() {

  // find the tag manager container ID
  var tag = window.google_tag_manager
  var containerId;
  for (var key in tag) {
    if (key.startsWith("GTM")) {
      containerId = key;
      break;
    }
  }

  // next, set the variables you want to get from your data layer
  var primaryCategory = window.google_tag_manager[containerId].dataLayer.get("primaryCategory");
  var primaryCategoryList = window.google_tag_manager[containerId].dataLayer.get("primaryCategoryList");

  // put the values in a map     
  _otmap.put("primaryCategory", primaryCategory);
  _otmap.put("primaryCategoryList", primaryCategoryList);     
     
  // expose the variables for collection
  ot_log_state();

Above example allows you to get data from the Google Tag Manager Data Layer, and submit this to LeadBoxer,

Important: Now the only requirement is that this function needs to load before the default tracking javascript (aka LeadPixel)

Cut & paste your dataset ID. You can find your dataset ID . Also give your tag a clear name.

Trigger on all pageviews
🧩
🌐
datasets overview page
Add code to Tag