> For the complete documentation index, see [llms.txt](https://help.leadboxer.com/leadboxer/llms.txt). Markdown versions of documentation pages are available by appending `.md` to page URLs; this page is available as [Markdown](https://help.leadboxer.com/leadboxer/fundamentals/elements/segments.md).
# Segments
## What is a segment?
In Leadboxer, you can save any combination of filters into a so-called ‘segment’. Segments allow you to save one or multiple filters and access it at any time. You can save segments, edit or duplicate them, or even send emails containing your segments or share them with colleagues.
Your leadboard contains one or two default segments:
1. **Top leads**: This segment filters out all leads without a known company name - easily allowing you to filter out the unidentified companies.
2. **Target Audience**: If your account was created after Januari 2023, you will have this Segment and is will be set with the values you defined during on-boarding: Industry, size and Country.
### **Use Filters to create Segments.**
Segments have several functions:
* To save as a combination of filters for easy access from the Segment drop-down menu.
* Share your Segments with team-members/ colleagues.
* As a start point for notifications - see this [article on setting up (email) alerts](/leadboxer/fundamentals/elements/notifications.md).
* As a start point for Lead Management in your [LeadBoard](/leadboxer/fundamentals/tasks.md)
If you would like to learn how to create your (first) segment use this tutorial:
{% content-ref url="/pages/NpgmXWzyTZt55psR0wEK" %}
[Creating your first Segment](/leadboxer/guides/creating-your-first-segment.md)
{% endcontent-ref %}
### **Saving segments**
Once you have created or applied a filter, you have the option to save the selection as a Segment.
Go to the bottom left corner of your screen and find the option ‘save’. This will bring up the Create Segment window to guide you through the 3 easy steps.
1. Here you will have the option to name your segment, but you can also set it to ‘private’ or ‘public’ (whether or not other users will have your segments available to them).
2. Set Notification: Choose if you wish to receive or send notifications when new Leads match the criteria of your Segment. If so, you can set format, interval, recipients, etc.
3. Review and save.
#### **Using segments**
Whenever you are looking at your [Leads & Accounts](/leadboxer/fundamentals/projects.md), you can find the dropdown menu for segments below the Quick Segments list under the Filter pannel. Simply click on the Filter button and pannel will appear where you can select the segment you or your colleagues have made.
### Quick Segments
To make life easy, we have added something we call Quick Segments. It is a list of pre-defined Segments that enable you to quickly filter your data to often seen use-cases.
* Persons Only: Show identified contacts (from email, forms, etc)
* Organizations Only: Show Identified Organizations with NO identified contacts
* Paid Leads: Show leads that came in through add campaigns (channel = paid)
* Organic Leads: Show Leads that came in organically
* Form Submissions: Show leads that were came in through a form submission
* Web visitors: Show leads that have had at least 1 website visit
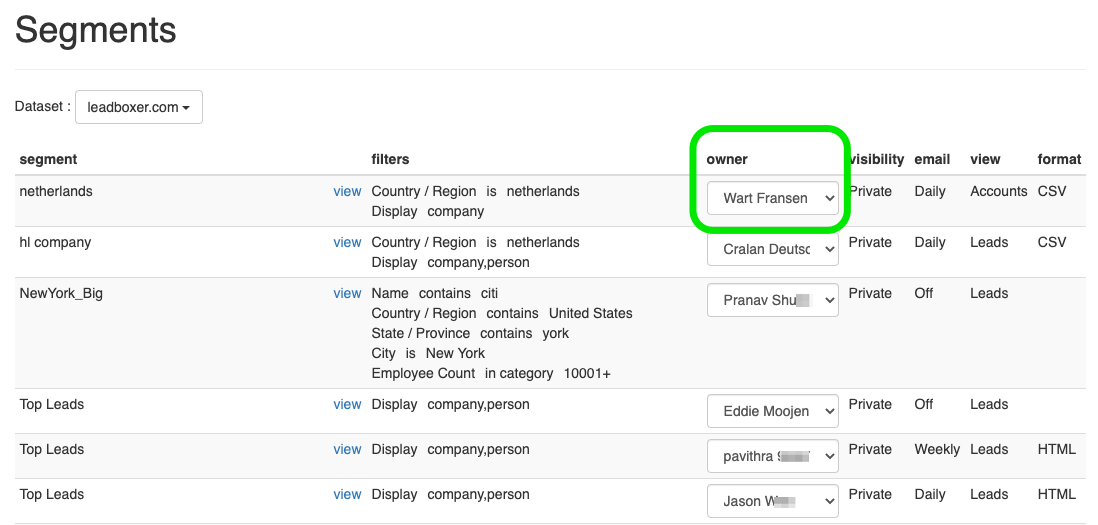
### Segments Overview
The Segment overview screen gives you a complete overview of all your segments. Here you can edit, duplicate, delete and change ownership of all your segments. The Admin of the account can see all Segments.
### **Editing segments**
To edit a previous saved segment, you can do this from the segment overview. There you can edit, duplicate and delete segments, When you click to edit a segment, this will take you to the leads view with the filters automatically loaded into the filter pannel, allowing you to view your filters but also edit them. When you press ‘save’ now, this will show the Create Segment screen where you can make modifications.
You also have the option to delete your segments. Simply select the delete option and confirm. Be careful - there’s no going back from deleting a segment!
If you would like to learn how to create your (first) segments see a tutorial below.
{% content-ref url="/pages/NpgmXWzyTZt55psR0wEK" %}
[Creating your first Segment](/leadboxer/guides/creating-your-first-segment.md)
{% endcontent-ref %}
### Ownership
You can (as an Admin) change ownership for all segments in your account. This is useful if you want to create or modify segments for your colleagues or clients
---
# Agent Instructions
This documentation is published with GitBook. GitBook is the documentation platform designed so that both humans and AI agents can read, navigate, and reason over technical content effectively. Learn more at gitbook.com.
## Querying This Documentation
If you need additional information that is not directly available in this page, you can query the documentation dynamically by asking a question.
Perform an HTTP GET request on the current page URL with the `ask` query parameter, and the optional `goal` query parameter:
```
GET https://help.leadboxer.com/leadboxer/fundamentals/elements/segments.md?ask=&goal=
```
`ask` is the immediate question: it should be specific, self-contained, and written in natural language.
`goal` is optional and describes the broader end goal you are ultimately trying to accomplish on behalf of the user. GitBook uses it to tailor the answer towards what is most useful for that goal.
The response will contain a direct answer to the question and relevant excerpts and sources from the documentation.
Use this mechanism when the answer is not explicitly present in the current page, you need clarification or additional context, or you want to retrieve related documentation sections.